To customize the signature appearence in order to include the information required by GEO 140 (regarding specialists in the fields of construction, architecture and urbanism), follow the steps below.
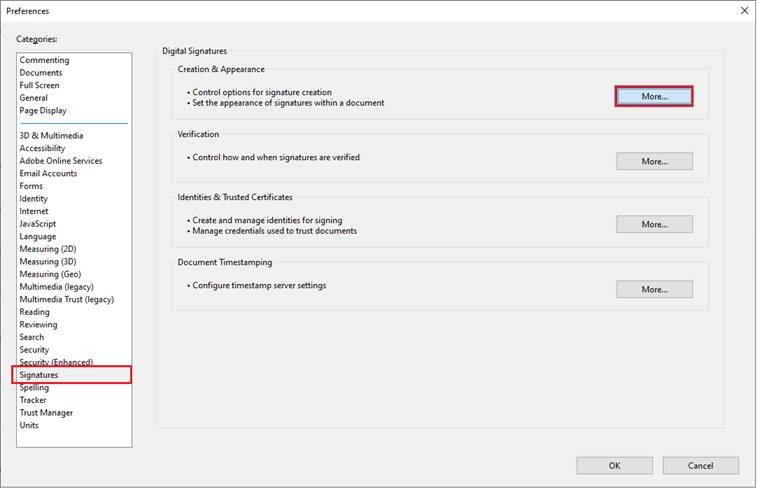
1. Open the Adobe Reader application and go to Edit -> Preferences -> Signatures -> Creation & Appereance (More…).
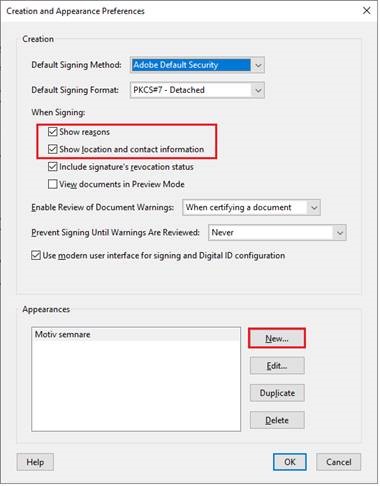
2. Check Show reasons and Show location and contact information, then select New to create a signature layout.
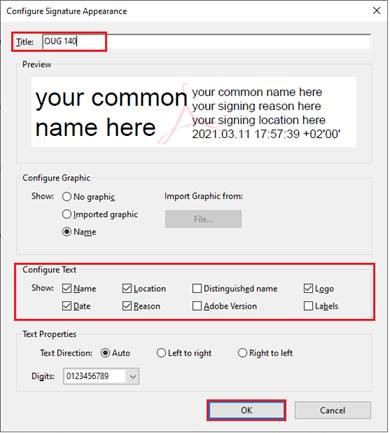
3. Give a title to the layout you want to customize, then set up the text that will appear in the signature:
- from the Configure Graph section you can configure what appears on the left side of the signature:
- check the Name check box to display the signer’s name;
- from the Configure Text section you can configure what appears on the right side of the signature:
- check the Name and Date boxes to display the signer’s name and date of signing;
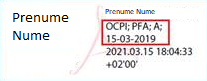
- check the Location and Reason check boxes to complete your recommended data by GEO 140; if there are many details to write, you can check both options, otherwise one is enough;
- check the Logo check box if you want the Adobe logo to appear behind the signature (optional);
- uncheck the Label check box so that only the contents of the Location and Reason labels appear, without their names.
After setup, press the OK button.
4. Sign the document by going to Tools -> Certificates -> Digitally Sign. In the signing process, choose the previously configured layout. Fill in the desired details in Reason or Location and press Sign.

5. The applied signature will have the details configured previously.